install.packages("tidyverse")
install.packages("here")
install.packages("janitor")into-the-tidyverse is a self-contained set of tutorials for data wrangling/analysis using R (via RStudio), with a very heavy emphasis on the tidyverse libraries. These are state-of-the-art tools that have always been (and always will be) free and open-source.
These tutorials require you to use GitHub (via the easy-to-use GitHub Desktop interface), and encourage the practice of version control. Learning how to use GitHub is an increasingly important part of learning how to do data science. For that reason, you will be required to use GitHub in order to follow along with these tutorials. The learning curve is not too steep, and these skills will serve you well in the future.
Setting up R
Install R
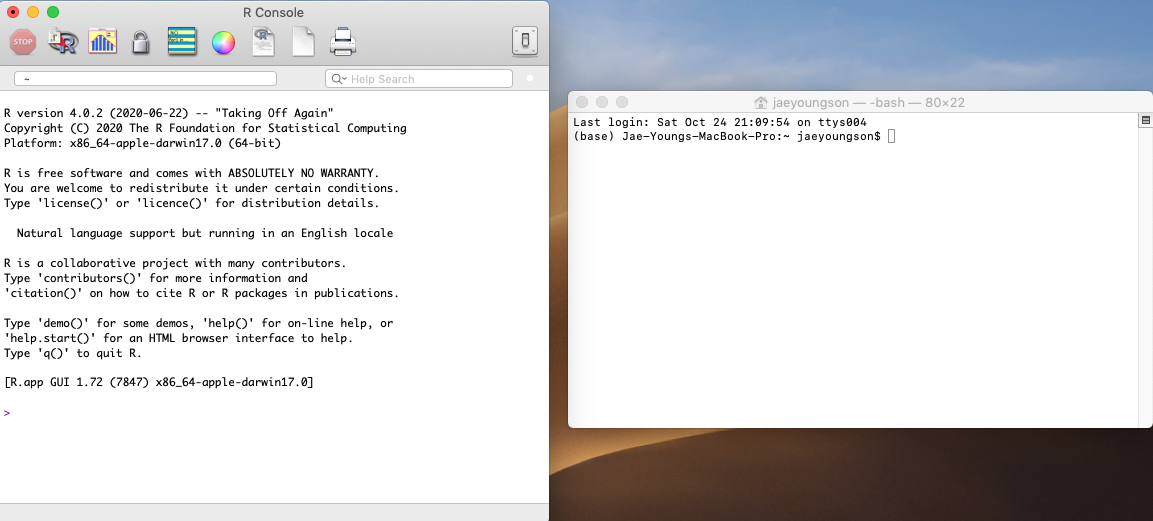
The first thing you’ll need to do is to install R from CRAN (Comprehensive R Archive Network).
This will install the R programming language, some essential libraries, and a text-based console that might remind you of an old-school terminal window.
Install RStudio
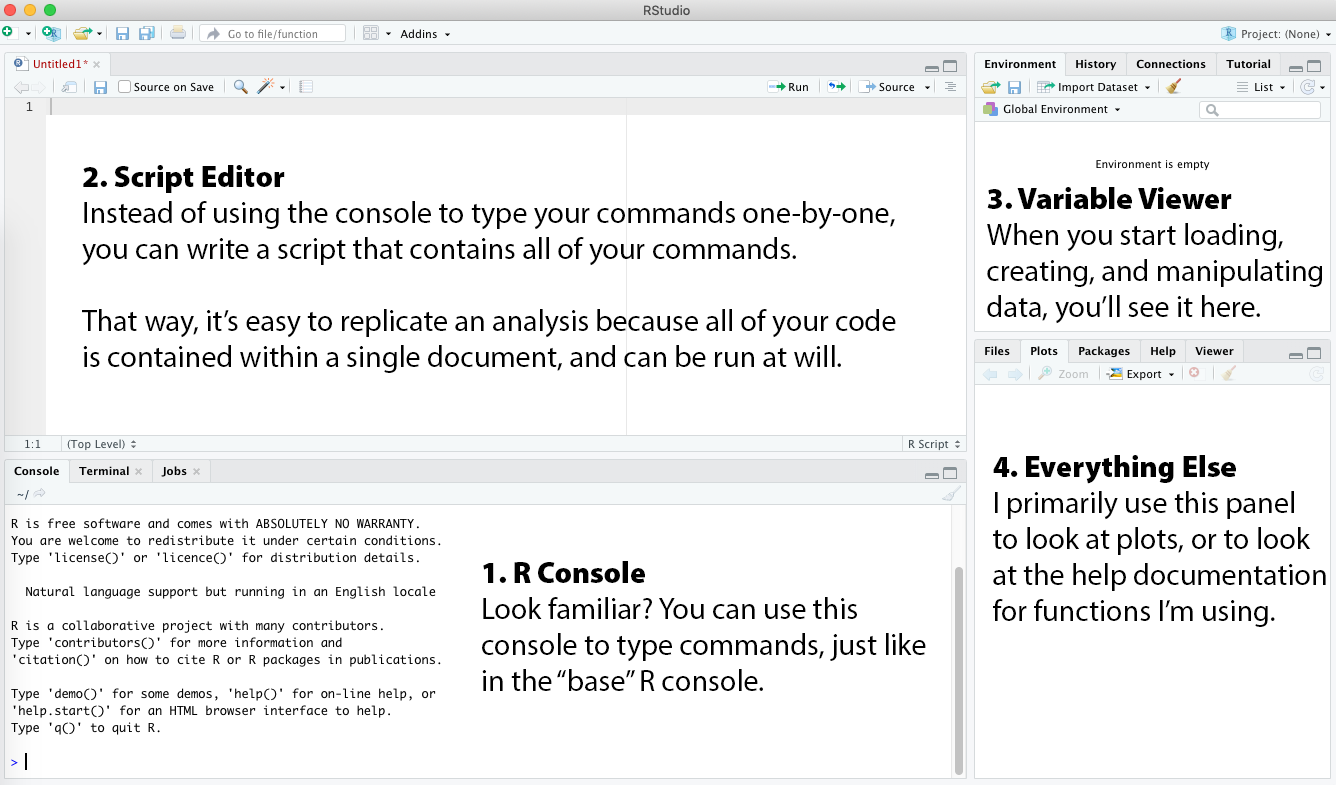
We will not be using the R console directly. Instead, we’ll be using RStudio, which builds on top of the console and gives you a lot of nice tools that help you work more efficiently. Once R is installed, you’ll then want to install RStudio.
You’ll immediately note that you have a lot more tools at your disposal:
- R Console: Look familiar? You can use this console to type commands, just like in the “base” R console.
- Script Editor: Instead of using the console to type your commands one-by-one, you can write a script that contains all of your commands. That way, it’s easy to replicate an analysis because all of your code is contained within a single document, and can be run at will.
- Variable Viewer: When you start loading, creating, and manipulating data, you’ll see it here.
- Everything Else: I primarily use this panel to look at plots, or to look at the help documentation for functions I’m using.
Set up RStudio
Open up RStudio and then open up Preferences. Find the “Workspace” settings. Make sure the checkbox is de-selected for “Restore .Rdata into workspace at startup”. Specify never as the option for “Save workspace to .Rdata on exit”. This will ensure that every time you open up RStudio, you start out with a clean working environment. You’d be amazed at how many problems can be prevented by doing this.
Download R libraries
You’ll need to install the following R libraries. Copy/paste the following code into the console window, then press enter to run it. We may need to install other libraries in the future, but these ones are so useful that I use them in virtually every project.
Setting up GitHub
Create GitHub account
You will need to create an account at GitHub.
git is a system for performing version control. What does that mean? Basically, it allows you to save “snapshots” of your files at any given moment. This allows you to track how your code (and data) change over time. So if you accidentally delete a lot of important code, and later realize that you need to recover it, git allows you to go back to a snapshot that contains the code you want. So you can think of it like an archiving system.
GitHub is an online data storage platform that uses git to store a full archive of changes you’ve made to a particular project. It allows you to keep a “synchronized” copy of the most up-to-date files on any computer that’s given access.
Let’s walk through some of terminology, which will help you to understand how GitHub works. Let’s say you’ve got some projects on your computer’s hard drive. Each project is stored in its own repository. When you start using git to version control your repository, it creates some hidden folders which contain a full archive of changes you’ve made (sort of - more on this in a second). Using git, you can then specify when to create a snapshot of your repository. This snapshot is called a commit because you’re committing to saving a copy of your repository at this exact moment in time. Importantly, you choose when to commit. Different people have different preferences. Some people like to commit at set time increments, regardless of whether their changes are big or small. Some people wait to commit until they have something they feel is “worth” committing. This is entirely up to you, and you’ll develop your own preferences as you gain experience.
Once you’ve committed something, you’ve saved a snapshot on your personal computer. But, that commit only lives on your computer. If you dropped your computer on the floor and destroyed its hard drive, your archive is gone forever. This is where GitHub comes in. You can save a copy of your files and your commit history onto GitHub, which allows you to clone a copy of your repository (and its full commit history!) onto any other computer. When you upload your commits to GitHub, it’s called a push. The GitHub repository contains only the “latest” versions of your files, which is dictated by when you commit and push your commits to GitHub. This can get a little more complicated when there are multiple collaborators editing files in the same repository. For simplicity, we’ll only consider two cases: 1) when a collaborator pushes a commit while you’re in the middle of changing something, and 2) how to prevent conflicting changes by working on a parallel copy of the repository.
Once you’re done changing something in your code, you might create a commit and try pushing that change to GitHub. Only to find that your collaborator has also been changing things in the code, and has pushed something before you had a chance to work on the most “updated” version of your repository. Since your commit is now on an “older” version of the repository, you must first synchronize your computer’s (older) version of the repository with the (newer) GitHub version. When you check whether there’s a newer version, this is called a fetch. When you detect that there’s a newer version, you then pull the newer version on your computer. In the best-case scenario, there is no merge conflict, and you can then push your commit without any further action. In the worst-case scenario, there is a merge conflict that you manually have to resolve. That is a giant headache to do, and you’ll want to avoid merge conflicts as much as possible. The easiest way to do this is to work with a fork (you could also do this with a branch, but we won’t be using them in this workshop… once you understand forks, it’ll be really easy to google what branches do in the future).
You might be familiar with the idea of a “multiverse” from comic books or science fiction. You’re living in the “main” timeline, but there are alternative realities that come in and out of existence at key moments in time. For example, there might be an alternative reality that’s exactly the same as this one, except that Ringo Starr never became the drummer for the Beatles. That would be an alternative universe that “forked” from our reality in 1962. That is exactly the logic of git. You could be working on a project with a collaborator who wants to try rewriting some existing code, but who wants to avoid messing up your existing data analysis pipelines. That collaborator could create a fork of your project, which diverges from the main timeline at a particular moment in time. The collaborator could then do whatever they wanted with their forked copy of the repository, without ever affecting what happens in the main copy. In principle, they could maintain a separate fork forever. Oftentimes, though, they’ll finish editing the code and will then want to merge it with the main timeline. This gives you a gentle way of merging the timelines together, since you can work through any would-be merge conflicts before trying to merge the two timelines back together.
Power users often use text-based commands to manage their git repositories, but I prefer using GitHub Desktop, which an easy-to-use point-and-click interface.
Install GitHub Desktop
Install GitHub Desktop, then log in with your new GitHub credentials to set it up. These instructions are for the into-the-tidyverse tutorials, but it’s not too hard to figure out how to fork/clone other repositories using these instructions.
If this is your first time ever using GitHub Desktop, click on “Clone a repository from the internet”, then copy/paste psychNerdJae/into-the-tidyverse into the textbox, then click Fetch Origin. This creates a cloned copy of my repository onto your hard drive (scroll back up to review terminology if you’re getting lost).
If you’ve used GitHub Desktop before, you might have some git-managed repositories on your hard drive already. If that’s the case, click on Add, then Clone Repository, then URL. Copy/paste psychNerdJae/into-the-tidyverse into the textbox, then click Fetch Origin.
You can now access all of the latest workshop materials. If you start creating/modifying code or data, you’ll see those changes tracked through GitHub Desktop. Remember that the only changes that are saved are the ones you take a snapshot of by committing.
You’ll note that when you try to commit new changes for the first time, you’ll be prompted, “You don’t have write access to into-the-tidyverse. Want to create a fork?” Click that. When you try to push your commit, you’ll see some scary warning message that you don’t have write access to psychNerdJae/into-the-tidyverse. Go ahead and create a fork. In the next prompt, you’ll be asked how you’re planning on using this fork. Click on “For my own purposes”. Now, your changes are pushed to a forked copy of yourUserName/into-the-tidyverse, which runs in a parallel timeline to my original copy. This lets you play around with code as you’re learning to use R, without ever disturbing my original files.
What if I make a change to my repository that you want to synchronize with your fork? For example, I could add more files to my repository as I develop new workshop materials, which you want to download. Since my repository is the original that your fork copies, my repository is known as the upstream (since it’s upstream in the timeline). You can always check to see if there are changes in the upstream by clicking on Current Branch and seeing whether there’s an option for upstream/main. If you don’t, that means there are no new commits in my version of the repository.
Now that all of the materials live on your hard drive (in the cloned repository you forked from mine), you’re ready to learn!
File and folder structure
These instructions are specifically for into-the-tidyverse, but should apply to any other tutorials I write.
Files in the parent folder: Whenever you want to engage with these workshops, remember to double-click on
into-the-tidyverse.Rprojfirst. This opens up a new R session (so that work you’re doing for this project doesn’t disturb whatever work you might be doing for other R projects).Tutorials: This is where you can find the HTML files containing all tutorials. Each one features a self-contained lesson on a particular topic.
Sandbox: This is the only folder you should be modifying. You should never, ever, ever modify anything that’s in any other folder. Seriously, under most circumstances, there should be no reason for you to ever navigate into these directories or open these files. If you’re wanting to save scripts, plots, whatever, you should do it in the Sandbox. Make sure to follow these three simple rules to make sure everything goes smoothly:
Basically, don’t touch anything in the Code and Data folders, and you’ll be alright. For those of you following along in realtime (i.e., I haven’t finished writing/developing all of the materials yet), this lets you avoid merge conflicts. In short, a merge conflict emerges when my version of the file looks different from your version of the same file. So if you take my code and you use it to play around by adding/deleting code, your file is now different from my file. When you try to “sync” new materials from my repository to your forked clone, this creates a merge conflict that you’re forced to resolve before you’re allowed to download my new materials.
Any time you write new code, do it in this Sandbox folder. The point of a sandbox is that you can do anything you want, and the (potentially destructive) consequences of your actions will never leave the sandbox. This is important because I’m going to encourage you very, very, very strongly never to simply run the existing scripts in the Code folder (or equivalently, simply copy/pasting existing code). So when you’re typing code from scratch and need a place to save your scripts, save them in the Sandbox.
On that note, you should be typing code from scratch. This sandbox should be full of code, whether it works or not. You learn a lot from typing things from scratch, especially when you’re a beginner. This is because you’ll inevitably type things incorrectly when you do it from scratch, and then you’ll have to self-diagnose why your code doesn’t work. That is invaluable experience for learning how to code. And it will also help with your muscle memory. It takes virtually zero time for me to write a pipe (
%>%) because I have typed thousands and thousands and thousands of pipes. You cannot get good at writing code quickly without building muscle memory. If you simply run existing code, or copy/paste existing code, you are hurting your own learning. There are no shortcuts to learning code. You must do it the hard way.
Code: I’m providing all of the R Markdown code from the videos in the Code folder. These scripts are provided primarily for folks with visual impairments, who would find it useful to have the text for accessibility reasons. By and large, I do NOT want any other group of people looking at this code. Why? Because most of your learning occurs when you make (and correct) mistakes, and you can only make mistakes if you’re trying things out from scratch. You can’t make mistakes if you’re simply running someone else’s code, or just copy/pasting code.
Data: We will be using a diverse range of datasets from a variety of sources. There are times when it will make sense for you to directly download the data from the source (such as timeseries data on covid19, which is updated on a daily basis), but otherwise, the datasets will be provided in the Data folder. When applicable/available, the URL to the original dataset will be documented in the relevant scripts.
Output: Sometimes, there’ll be some kind of output I want to save to your hard drive (like a plot or table), so that you have a sense for what your output ought to look like. These will be saved in the Output folder. Anytime you have some output, you should save that to the Sandbox instead.
…Now what?
If you’re ready to get started, go to the folder you’ve just created on your hard drive. From there, click into the Tutorials folder, and have fun with the first session!